Showing posts with label pattern. Show all posts

October 20, 2009

You win some, you lose some...

This newest semester at University has been less that enjoyable, to say the least. My French professor has a personal problem with me, and so I find myself in 3 of 4 classes that I can't stand. Also I have so much French homework that the rest of my grades are slipping. And I'm getting at most six hours of sleep a night.

Ravelry Links follow!!!

BUT through it all, my knitting preservers! In fact I've done more knitting in the last few months than I have hooking. However, all of my HPKCHC projects this month that I've turned in have been crocheted!

So for your viewing pleasure!!!:

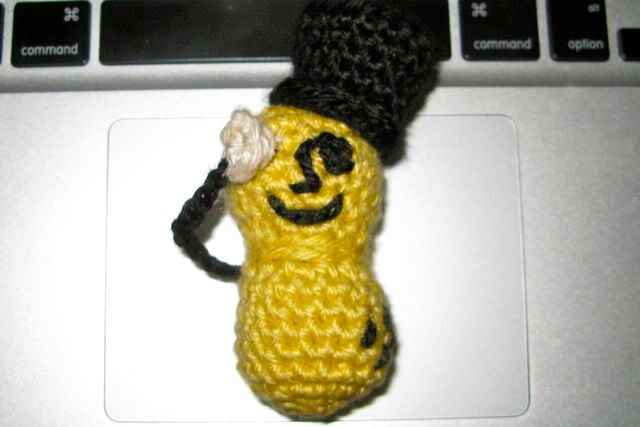
My dad's Christmas gift, because we tease him about being Mr. Peanut!


And I'm most pleased with this little guy! I took this pattern (non-Ravelry link), and modified it, which you can read following the picture!

Here's what it should look like:
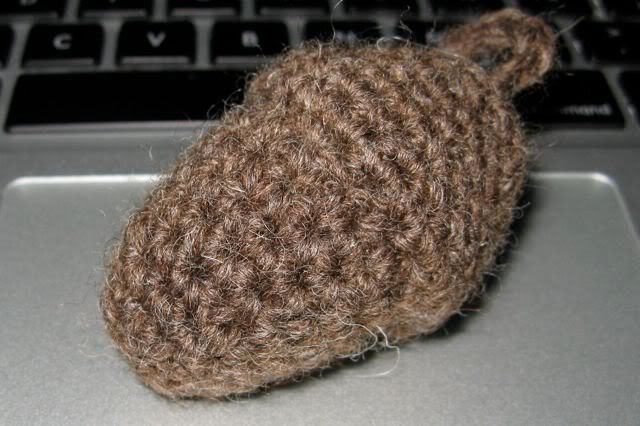


But here's what mine does!
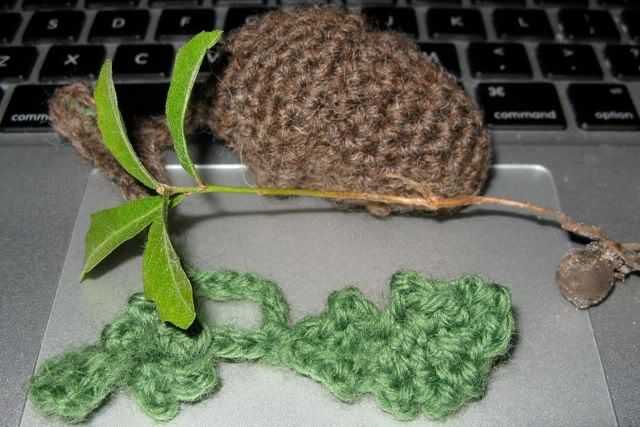


Modification Notes

I really wanted an oak sproutling to emerge from an acorn, like they do in real life, so I took some liberties with this pattern!

First I went outside for a live reference and pulled up a young acorn sprout that the squirrels felt belonged in the flower beds. They’re mistaken.

After I made the acorn and it’s cap, I began to think about how best to add the sproutling. I decided to have it pull out from the center of the cap. When you finish the cap, DON’T cut the yarn off or finish it up. Leave your last loop there, stick a paper clip in it so that it doesn’t rip out your work and leave it all attached to the skein, you will come back to it to use it!

Since I crocheted this project, I think my cap was longer than it would have been if I’d knit it, so I folded my cap under a little and stitched it around, to give it a nice rim! Then I moved on to the leaves.

Leaves: I used a size smaller hook on these. These were pretty much just free-styled, as I wanted them to look random, like they do in real life. I chained about 14 for the first leaf, and crocheted down one side for half of the blade. Since I started at the top of leaf I just sc-ed into the first look from my hook, then sc-ed and chained 2, then sc back into it, then sc-ed into the next. The stitch after that I sc-ed, then ch 2, sc into the same hole, ch 2 again, sc back into the same one, then sc a few down, then slipped over to the other side and worked my way back to the top of the blade replicating what I’d done on the first side.

There were a few gaps, so when I finished it off at the tip, I left a length of yarn, and sewed the blade together down the back along the rib, and this made them fold slightly, which was a perfect look!

The second leaf went a little different, but once you understand the basic idea it’s not that hard to variate it. Join the two, or more (doubt anything over 3 would fit tho), and make sure you have a stem of about ch 20 in green.

The Brown Part of the Stem:
This part starts at the cap, I just chained 10, then joined it to the bottom of the green stem, and chained into it, covering the green tail as I went. This goes for about 10 chains, so you actually end up with 20 visible in brown, and 10 visible in green, the opposite of what it was before assembling! Just weave the end of the brown. I put a needle on it and whipped around the stem some more to mostly cover the green, then I pulled my end down thru that, pulled it SUPER tight, cut it, and then when I eased it out it disappeared! Tada! Magic.

Assembly:
I stuffed the acorn bottom with some tangled up leftovers of the brown wool (this is a great use for yarn scraps, fyi), and sewed a few strings over it thru the rim of the acorn, to keep it held in.

Then I made sure the sprout was pulled to the outside of the cap, and sewed the cap onto my acorn body. Very easy.

How It Works
You stuff the leaves first into the hole in the cap, then the rest of the stem, except for the 10 sc part of the brown that is skinny/narrow. This is your dongle/loop. You can hang this on a Christmas tree if you wanted, and then surprise people with what it can do!

I wish I’d used a lighter brown on the acorn body, but I didn’t have another brown, so I used what I had, overall I’m VERY pleased with it!


There are more pictures if you follow the Ravelry link to my project!

December 21, 2007

“A bear, however hard he tries, grows tubby without exercise.”

A new day, a new post! Yay! So the Gryffy scarf has been completed! Hurrah! And more work has been done on the Ravenclaw scarf as well, but that's neither here nor there! This is to celebrate being FINISHED w/Gryffy. It's a love/hate relationship! 

So as loyal readers would know, the scarf was 30 stitches across, then folded in half and sewn. I've sewn the ends together as well, just a simple whipstitch, being to try and find out how my fringe should look. I ended up on atypically.knit's site for some help! This is where I started, back when I thought I could knit it! The needles and I just didn't click! (pun intended!) But she does have very valuable information, in fact the pattern she gives is great too, I just couldn't use it! Anyways she suggest 8 inch long strips of yarn, folded in half, in groups of three, every 2 stitches. And I think that worked great. Now I didn't need as many as she uses, I only did 9 sets per side, every 2 stitches or so. I like to approximate. If you're making one too, do what makes you feel happy! 

She suggested trimming them all the exact same length when done, but I didn't do that. I know that when you do that they still end up a little uneven due to time and wear. I trimmed the ones that were really long, but that's it! Now if the intended owner doesn't like it I'll trim it of course! But otherwise it stays! 

Enjoy the pictures! And of course, you can always see it on Ravelry!

December 20, 2007

"Or yet in wise old Ravenclaw, if you've a ready mind, where those of wit and learning, will always find their kind."

Well I'm finally getting around to a new post! I'm so horrible! I think I'll try and update my blog daily for a while, except some of this weekend before Christmas, because we're going out of town and I don't want to have to use the really slow dial-up where we'll be. Or the PC that goes w/it! The updates may be a full post or project, or simply some random picture I've taken! Hey a post is a post right? :D

So the Gryffy scarf has been going swimmingly! I'm completely finished crocheting it and have folded it, stitched it in half, washed it, dried it, and shaped it! It looks great! I just have to sew up the ends now and add tassels.... The pattern doesn't really say how to do that though, so I guess it's up to me decide what way I want to do it! I'm going to have to do some google images searching I guess! 

Here it is in all of it's Godric Gryffindor Glory! Now that I see the first two pics I think the camera washed them out a little! The rolled up picture is true to color!


So last weekend a friend and I went to an LYS (Local Yarn Shop) across town from us, and I just got all caught up in the beautiful, colorful, sadly expensive, wools. So much so that I bought myself some blue and a grey/silver by Brown Sheep and have already started work on my Ravenclaw scarf! My poor other projects! They're so unloved! I actually hope to have my scarf to the point where the Gryffy is by Christmas, and Gryffy done by tomorrow! *fingers crossed* 

If you want to know which yarn brand and colors I picked for the Ravenclaw scarf just pop on over to here on Ravelry! If you're not a Ravelry member just send me an email or leave me a comment! Here's a picture for an idea though! 


I also went w/22 stitches across on my scarf, rather than the 30 for Gryffy. I'm quite mad at myself right now though, I had planned on using the bronzy color for my scarf like in the books, and I blanked.... And I'm using silver like in the movies... I can be such a ditz at times! Owell, it's still really pretty! I'm actually about to add on the 5th set of bars, so use your imagination and add them on to this picture from last night! 


The two yarns are really 2 different thicknesses in my opinion, the blue barely making a worsted weight to me... But the nice owner insisted they worked well together and showed me something she had made with the two, and they did indeed look great together. Though they aren't quite the same size like she said, they fit nicely. The grey being thicker makes the captured bars just slightly bigger, which is a look I rather like. If you stretch the grey gently it is the same size as the blue, and the blue doesn't stretch at all, so I guess in a way they are the same size! All I know is it was $7.20 a skein! This scarf better last FOREVER! Though yarn is cheaper than professional therapy! 


That's all for now! Catch ya'll later!

September 13, 2007

Club Sandwiches not Seals!


So this is an obnoxious little seal I made for a friend, the yarn was evil! By the time I got done crocheting all the pieces I didn't want anything more to do with it! So I made her sew the fins on and the nose and eyes! It was the least I could do, lol! I can't remember how many ounces it took, if I do I'll edit the post, I do know it was a wool mix she got from JoAnn's but that's about all I remember... It's been over a month since I made him. Anyways she got the amigurumi pattern from Planet June's Etsy shop. It was a very good pattern, I've also bought the Ferret pattern from PJ and I do plan on making it sometime! I finally found the yarn I want for it! Maybe that should be my next project!

September 3, 2007

Scarf of fuzz....


So a friend asked me to make her a scarf a few weeks ago, gave me the yarn, and so last night I put off delaying and buckled down! 3-4 episodes of CSI: Las Vegas later, we had this!

The variegated yarn was made from 70% wool and 30% soy. And it was a pain, it would go on forever before changing, which made it look awfully funny, but the Alpaca was amazing. Super soft, stayed together well, though it did shed sorta like a cat.... You can't really see it in the scarf, but the fringe and the single crochet row on each side of the middle is made from it. It almost matched the beige in the variegation too closely.

Over all I think it came off okay.

If you want to try your own hook at this I found the pattern here. Quite simple and quick.

P.S. I should mention that I think that pattern is slightly wrong and that you need to add a row 7, just by repeating 6. It's up to you, but if you don't do it one side comes out smaller than the other. Also I found that to help make your work look neater if when you go to start Row 2, if you attach it to the other side of your work, where you first started, you get a nice neat outside edge! No border needed to make things pretty! If that's confusing just email me I'll be glad to help you understand it!